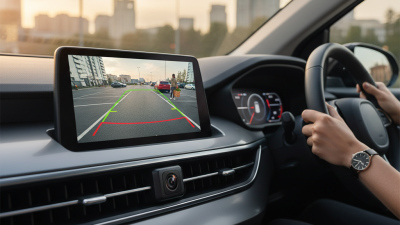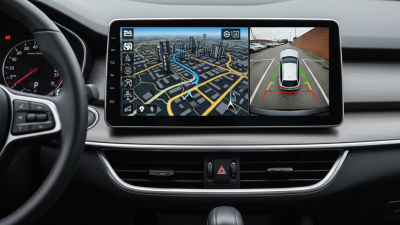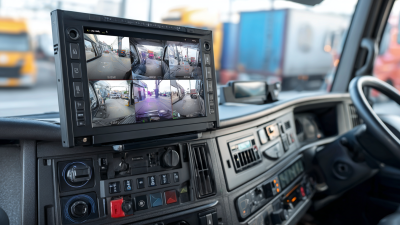
Choosing a Digital Rear View Camera in 2026 requires more than comparing screen size or advertised resolution. A reliable system should improve rear visibility without creating new distractions. Look for a clear image, minimal delay, stable signal, and useful performance in darkness or rain. A camera that looks sharp in a showroom may show glare, water spots, or blurred edges on a wet highway.
Real-world testing matters. Check the view from the driver’s normal seating position, not only from a sales display. Observe how quickly the image appears after shifting into reverse. Test the camera at dawn, beneath streetlights, and near bright headlights. Night vision quality can vary greatly. Some systems also display distance lines, but these guides are not always perfectly aligned with the vehicle.
Installation deserves equal attention. Confirm compatibility with your vehicle’s power system, mounting location, display, and existing sensors. Professional fitting can prevent loose wiring, water entry, and accidental damage to trim panels. Choose equipment with clear documentation, warranty support, and a manufacturer that publishes realistic specifications. Independent reviews from installers and long-term users can reveal problems that brochures omit.
No camera is perfect. A wider view may introduce distortion, while a smaller screen may reduce distraction but hide details. Personal driving habits, climate, parking conditions, and budget should shape the decision. This guide examines the practical evidence behind each choice, while recognizing that technology changes quickly. The best Digital Rear View Camera is not necessarily the most expensive model. It is the one that remains dependable when visibility becomes difficult.
How to Choose a Digital Rear View Camera in 2026?
Start with the required view, not the screen size. FMVSS 111 focuses on a rear-visibility zone approximately 3 meters wide and 6 meters behind the vehicle. This area should remain visible when a driver selects reverse. Check the camera’s documented viewing angle, mounting height, and image coverage against that space. A wide image can still leave blind areas near the bumper or corners.
Mark the zone on level ground during testing. Place small objects at several points, including both rear corners. Then inspect the display from the normal driving position. The image should show the ground close behind the vehicle, not only distant traffic. In practical checks, I also examine image delay, low-light clarity, glare, and distortion. These details affect real decisions. A camera may meet a listed resolution, yet perform poorly in rain or direct sunlight.
Keep the lens away from exhaust residue and spray paths. Confirm that the mount cannot shift after vibration or a minor impact. The monitor should be easy to read without blocking other essential information. Do not assume a larger field of view is always safer. It may make objects appear smaller. I once treated corner coverage as sufficient, then noticed a short obstacle disappear near the bumper. That was a useful mistake. Measure the actual view, and recheck it after installation.
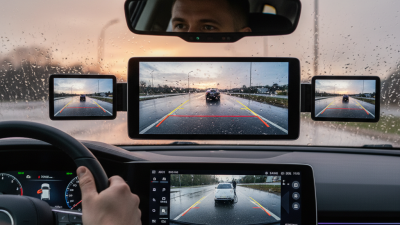
Choosing a digital rear view camera in 2026 means comparing image quality, not just pixel counts.
A 1080p-class system usually provides enough detail for license plates, bicycle spokes, and a child’s outline at normal mounting distances. However, resolution alone can mislead. The 2024 Automotive Camera Market report from MarketsandMarkets identifies higher-resolution sensing as a major development, while field testing still exposes weaknesses in poor lighting.
HDR deserves careful attention. A camera leaving a bright parking garage may show a black road and a white sky without effective dynamic-range processing. Look for stable highlight control and natural shadow detail, preferably verified during dusk and direct headlight tests.
NHTSA’s rear visibility requirements focus on a defined area behind the vehicle, but a wider usable field of view can reveal approaching cyclists sooner. Wider is not always better. Excessive fisheye distortion can make a nearby object appear farther away.
A practical test should include rain, road spray, and a dirty lens. It should also check latency when reversing slowly.
SAE visibility research and NHTSA guidance both emphasize seeing hazards across the rear zone, yet neither replaces real-world evaluation. A 140-degree view may cover more pavement, while a narrower image can preserve clearer distance judgment.
I would prioritize clean 1080p output, credible HDR, and measured coverage over impressive specification sheets. Specs can flatter. Night footage tells more.
How to Choose a Digital Rear View Camera in 2026?
Night performance deserves more attention than daytime sharpness. NHTSA’s Traffic Safety Facts reports that about half of traffic fatalities occur at night, despite roughly one-quarter of travel happening then. Test the camera after sunset, under wet pavement, and beside bright headlights. Look for readable license plates at 20 meters, controlled glare, and minimal blooming around lamps. Infrared assistance can help, but it may create a flat, artificial image. That trade-off is easy to miss.
A 30 fps camera refreshes every 33.3 milliseconds. That sounds fast. However, real image latency includes capture, processing, transmission, and display time. Keep the complete path below 200 milliseconds, not just the sensor’s specification. Use a stopwatch and a moving object during testing. SAE J3134 provides a useful reference for evaluating camera-based indirect vision systems. Check stable frame delivery too; dropped frames can feel worse than a lower resolution.
I once trusted a smooth showroom demo. It failed in rain. Therefore, compare footage from a dark garage, a tunnel exit, and a vibrating road. Ask for measured latency, not “real-time” wording. A small delay becomes obvious when reversing near a narrow wall. Specifications help, but imperfect field testing reveals the camera’s real behavior.
How to Choose a Digital Rear View Camera in 2026?
A reliable digital rear view camera must survive more than rain and road spray. Check for IP69K protection, which indicates resistance to high-pressure, high-temperature water jets. In practical use, this matters after winter driving, road cleaning, and muddy construction routes. However, IP69K does not prove every connector is equally sealed. Inspect the plug design, cable joints, and mounting points. Small gaps can become serious faults.
Automotive operating temperatures below −40°C deserve equal attention. Ask for test data covering cold starts, continuous operation, and rapid temperature changes. A camera may display a clear image in a warm showroom, then respond slowly after a night outdoors. The cable should remain flexible, while the screen should avoid freezing delays. Cold soak testing is important.
I have seen moisture enter through poorly protected cable ends. It was not dramatic at first. The image only flickered during reversing. Look for documented thermal testing, impact resistance, and stable image performance. A real test report is more useful than a broad product claim. Still, specifications can be incomplete. Ask how the camera handles condensation after moving from −40°C air into a heated vehicle. That detail is easy to overlook, but it can affect daily confidence.
| Selection Criterion | Minimum Requirement | Preferred Specification for 2026 | Why It Matters | Verification Method |
|---|---|---|---|---|
| Ingress Protection | IP67 or higher | IP69K, tested to ISO 20653 or an equivalent automotive protection standard | IP69K is designed for protection against high-pressure, high-temperature water jets used during vehicle washing and cleaning. | Request the test report or certificate and confirm that the rating applies to the complete installed camera assembly. |
| Operating Temperature | At least −30°C to +70°C | −40°C to +85°C or wider | A range below −40°C provides a better margin for winter start-up, exposed vehicle locations, and rapid temperature changes. | Check the manufacturer’s operating range separately from the storage range; do not treat storage temperature as operating temperature. |
| Image Resolution | 1280 × 720 pixels | 1920 × 1080 pixels, with stable output at the display’s native resolution | Higher resolution can improve recognition of obstacles, lane markings, pedestrians, and trailer connections. | Confirm actual output resolution rather than only the sensor’s maximum still-image resolution. |
| Horizontal Field of View | Approximately 120° | 135°–170°, selected according to vehicle width and mounting position | A wider view reduces blind zones, but excessive wide-angle distortion can make distance judgment more difficult. | Review a calibrated test image from the intended mounting height and angle. |
| Low-Light Performance | Usable image at approximately 0.1 lux | Effective night image below 0.05 lux, with automatic exposure and wide-dynamic-range processing | Improves visibility in unlit loading areas, rural roads, parking facilities, and nighttime reversing. | Test at night with headlights, reverse lights, and strong backlighting enabled. |
| Video Latency | Below 200 ms | Below 100 ms end-to-end | Low latency gives the driver a more immediate view when reversing or maneuvering in confined spaces. | Measure camera-to-display delay; do not rely only on the camera’s internal processing specification. |
| Automotive Voltage Compatibility | 12 V nominal system | 9–36 V DC input for 12 V and 24 V vehicles, with reverse-polarity and transient protection | Suitable input protection helps prevent damage caused by voltage variation, incorrect connection, and vehicle electrical transients. | Check the rated input range, polarity protection, fuse requirement, and transient test results. |
| Vibration and Shock Resistance | Automotive vibration testing available | Testing aligned with ISO 16750-3 or an equivalent vehicle environmental test method | Reduces the risk of image interruption, connector failure, or focus shift on commercial and off-road vehicles. | Request test conditions, vibration axes, frequency range, acceleration, and duration. |
| Lens and Housing Materials | Sealed automotive housing | UV-resistant housing, anti-fog lens treatment, corrosion-resistant fasteners, and sealed cable entry | Protects image quality and mechanical integrity during sunlight exposure, condensation, road salt, and chemical cleaning. | Inspect the housing, gasket, lens coating, connector seal, and corrosion test documentation. |
| Display and Signal Interface | Compatible video input and trigger wire | Digital interface matched to the display, automatic reverse trigger, shielded cable, and locking automotive connector | Ensures reliable image transmission and automatic activation when reverse gear is selected. | Verify connector pinout, signal format, cable length, shielding, and trigger-voltage requirements. |
Note: IP69K and temperature claims should be confirmed through current test reports for the complete camera, cable, connector, and mounting assembly. Vehicle installation conditions can reduce the practical operating temperature and protection level.
How to Choose a Digital Rear View Camera in 2026?
Verify ISO 16505, UNECE R46, Wiring, Display Size, and Warranty Compliance
Choosing a digital rear view camera requires more than checking image sharpness. Verify whether the system follows ISO 16505 requirements for camera-monitor performance. Ask for test reports, approval numbers, and the exact product configuration. A general certificate may not cover every screen, cable, or camera module. Check UNECE R46 compliance when it applies to your vehicle and market. Do not rely on a sales-page sentence alone. Request written documentation from the manufacturer or an authorized technical representative.
Tips: Inspect the wiring before installation. Look for sealed connectors, protective sleeves, proper grounding, and a correctly rated fuse. Measure the cable route from the rear camera to the dashboard. A loose cable near a hinge can fail after repeated movement. Choose a display large enough to show detail, but not so large that it blocks visibility. Check brightness in direct sunlight and at night. Glare matters.
Review the warranty carefully. It should state coverage for the camera, monitor, wiring, and installation-related defects. Confirm the warranty period, repair process, and replacement conditions. Keep photographs of the installation and test results. This small record can prevent arguments later. Bigger screens are not always safer. I once underestimated mounting position, and a few centimeters changed the viewing angle. Recheck the driver’s line of sight before final tightening.
Buyer verification checklist based on ISO 16505, UNECE R46, installation requirements, display specifications, and warranty terms.
The values show the number of practical verification points in this checklist. ISO 16505 addresses camera-monitor-system performance and human factors, while UNECE R46 covers indirect-vision devices and approval requirements. Display size and warranty terms should be confirmed from the supplier because they are not defined by one universal minimum requirement.